


25-63
User Guide for Cisco Security Manager 4.4
OL-28826-01
Chapter 25 Configuring IKE and IPsec Policies
Configuring IKEv2 Authentication in Site-to-Site VPNs
Tip The IKEv2 Authentication policy is not a shared policy. You must configure the policy for each VPN
topology in which you support IKEv2 negotiations. You cannot configure global IKEv2 authentication
options for use by all of your VPN topologies. When using the Create VPN wizard, even if you elect to
support IKEv2, the IKEv2 Authentication policy is never configured.
Before You Begin
The IKEv2 Authentication policy is used only if you enable IKEv2 in the VPN in the IKE Proposal and
IPsec Proposal policies, and if at least some of the devices in the topology support IKEv2.
To configure IKEv2, the device must be an ASA running ASA Software release 8.4(1) or higher. For
more information on device support, see Understanding Devices Supported by Each IPsec Technology,
page 24-9.
Tip If you support only IKEv2 in the topology, ensure that you unassign the IKEv1 Preshared Keys and
IKEv1 Public Key Infrastructure policies to avoid validation warnings.
Related Topics
• Understanding IKE, page 25-5
• Deciding Which Authentication Method to Use, page 25-8
Step 1 Open the Site-to-Site VPN Manager Window, page 24-18, select a regular IPsec topology (that supports
IKEv2) in the VPNs selector, then select IKEv2 Authentication in the Policies selector.
For reference information on the policy, see IKEv2 Authentication Policy, page 25-64.
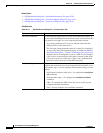
Step 2 On the Global IKEv2 Authentication Settings tab, configure the authentication type that should be
used for devices in the VPN for which no override is configured on the Override IKEv2 Authentication
Settings tab. Select the option that is used by most devices in the VPN. You can configure a global
preshared key or trustpoint:
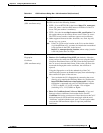
• Global Preshared Keys—To configure a global preshared key, select Key Specification and then
configure one of the following options:
–
User Defined—Enter the desired global key and enter it again in the Confirm field.
–
Auto Generated—Enter the length of the key that should be generated and select whether you
want to use the same key for all tunnels or the same key at both ends of a single tunnel. If you
select neither of these options, unique keys are generated for every end point.
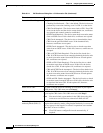
You can also select Regenerate Key (On Next Deployment) to have new keys generated. This
allows you to periodically re-key the VPN. The check box is cleared after the next successful
deployment.
• Global Trustpoint (CA Servers)—To configure trustpoint certificate authorization, select PKI
Specification and enter the name of the PKI enrollment object that identifies the Certificate
Authority (CA) server. Click Select to select the object from a list or to create a new object.
Step 3 If you want to override the global IKEv2 authentication configuration for specific devices, click the
Override IKEv2 Authentication Settings tab and do any of the following:
• To add an override, click the Add Row (+) button and fill in the IKEv2 Authentication dialog box.
You select the local and remote peers for which to create the override, and then specify the preshared
key or CA server that should be used. See IKEv2 Authentication (Override) Dialog Box, page 25-66.
• To edit an override, select it in the table and click the Edit Row (pencil) button.