16-12
User Guide for Cisco Security Manager 4.4
OL-28826-01
Chapter 16 Managing Firewall Access Rules
Configuring Access Rules
Right-click Menu
A right-click menu is also available. This menu provides access to many of the functions listed above;
the options presented depend on the location right-clicked:
• If you right-click a rule in the table, the options may include editing functions relative to the specific
table cell right-clicked. For example, the command “Show Hit Count Details” is included when you
right-click a Hit Count cell. See Editing Rules, page 12-9 for more information.
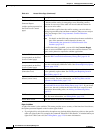
Enable conflict detection
Generate Report
(neither option presented on
the IPv6 Access Control
page)
Enable or disable automatic conflict detection. This feature is enabled
by default and the setting is managed per user. Disabling conflict
detection for one access rules table will also disable the feature for
other access rules tables.
You can disable conflict detection while creating your rule table or
making large modifications and then re-enable it when you are ready to
verify your changes. See Using Automatic Conflict Detection,
page 16-25.
Note For details on the fields and user interface elements available as
part of the automatic conflict detection feature, see
Understanding the Automatic Conflict Detection User
Interface, page 16-27.
If conflict detection is enabled, you can click the Generate Report
button to create an HTML report of any rule conflicts detected. This
report can be printed or exported to another application.
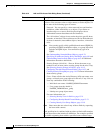
Refresh Hit Count
(not presented on the IPv6
Access Control page)
Click this button to update the hit information displayed in the table;
opens the Hit Count Selection Summary Dialog Box, page 16-18.
Query
(not presented on the IPv6
Access Control page)
Click this button to run a policy query, which can help you evaluate
your rules and identify ineffective rules. See Generating Policy Query
Reports, page 12-28
Find and Replace button
(binoculars icon)
Click this button to search for various types of items within the table
and to optionally replace them. See Finding and Replacing Items in
Rules Tables, page 12-16.
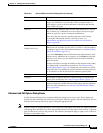
Up Row and Down Row
buttons (arrow icons)
Click these buttons to move the selected rules up or down within a
scope or section. For more information, see Moving Rules and the
Importance of Rule Order, page 12-19.
Add Row button Click this button to add a rule to the table after the selected row using
the Add and Edit Access Rule Dialog Boxes, page 16-13. If you do not
select a row, the rule is added at the end of the local scope. For more
information about adding rules, see Adding and Removing Rules,
page 12-9.
Edit Row button Click this button to edit the selected rule. You can also edit individual
cells. For more information, see Editing Rules, page 12-9.
Delete Row button Click this button to delete the selected rule.
Table 16-1 Access Rules Page (Continued)
Element Description


