68-39
User Guide for Cisco Security Manager 4.4
OL-28826-01
Chapter 68 Health and Performance Monitoring
Alerts and Notifications
Note Alerts can be cleared automatically by HPM if you change the relevant threshold(s). Like
alerts you have cleared, these alerts can be viewed in the View Cleared Alerts window (see
Alerts: History, page 68-39).
Notes and other information for cleared alerts are saved in an Alerts database for 30 days.
Alerts: History
All alerts generated for monitored devices are displayed as a table in the HPM window. You can filter
the table by any visible column parameter, as described in Alerts: Viewing, page 68-37.
You also can use the View Cleared Alerts window to access and view previously cleared alerts; you
specify a set of devices and a time range. (Clearing alerts is described in Alerts: Acknowledging and
Clearing, page 68-38.)
Note Notes and other information for cleared alerts is maintained in an Alerts database for 30 days—you
cannot access alerts more than 30 days old.
Follow these steps to open and use the View Cleared Alerts window:
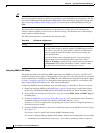
1. In the Alerts screen, click the View Cleared Alerts button next to the List Filter field to open the
View Cleared Alerts window. (See Alerts: Viewing, page 68-37 for more information about
accessing the Alerts screen of the HPM window.)
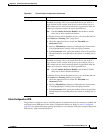
2. Specify the alert View Settings; these define the set of alerts you wish to view:
–
Specify the devices of interest; All devices are selected by default. To select a particular set of
devices:
a. Click the Select button to open the Select Devices dialog box.
b. Select the desired device(s); deselect any devices you wish to exclude.
c. Click OK to close the Select Devices dialog box.
–
Specify the types of Alerts to display: select or deselect Critical, Warning and Normal.
–
Define the desired Time Range by choosing a From date and time, and a To date and time. All
alerts with a First Seen time within this range will be displayed.
From and To each present a standard drop-down calendar used to select a month and day.
Use the time field below each calendar to specify the precise start or end time, respectively.
Highlight a digit and click the up or down arrow, or simply type the desired number. You can
also click the Now button to specify the present moment.
3. Click the Search button to display the defined set of alerts.
Note that the View Cleared Alerts window provides a List Filter field that you can use to filter the
cleared-alerts display. Using this field is described in Using The List Filter Fields, page 68-17.
Refer to Working with Table Columns, page 68-8 for other methods of filtering this table.


