


65-28
User Guide for Cisco Security Manager 4.4
OL-28826-01
Chapter 65 Managing Cisco Catalyst Switches and Cisco 7600 Series Routers
VLANs
Navigation Path
• (Device view) Select Interfaces/VLANs from the Device selector, then click the VLANs tab.
Related Topics
• Interfaces/VLANs Page—VLAN Groups Tab, page 65-33
• Interfaces/VLANs Page—Interfaces Tab, page 65-7
• Viewing a Summary of Catalyst Interfaces, VLANs, and VLAN Groups, page 65-3
• Understanding FlexConfig Policies and Policy Objects, page 7-2
• Create and Edit VLAN Dialog Boxes, page 65-28
• Filtering Tables, page 1-45
Field Reference
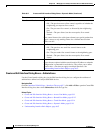
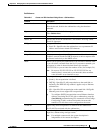
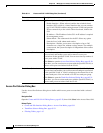
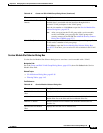
Create and Edit VLAN Dialog Boxes
Use the Create VLAN dialog box (or the Edit VLAN dialog box) to configure or reconfigure VLAN
settings and attributes.
Navigation Path
Go to the Interfaces/VLANs Page—VLANs Tab, page 65-27, then click the Add or Edit button beneath
the table.
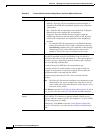
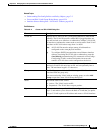
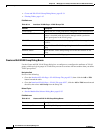
Table 65-10 Interfaces/VLANs Page—VLANs Tab
Element Description
VLAN ID Interface-specific identity of the VLAN that a table row describes. The
VLAN ID specifies where 802.1Q tagged packets are sent and received
on the subinterface; without a VLAN ID, the subinterface cannot send
or receive traffic. Valid values range from 2 to 4094 (VLAN ID 1 is
reserved).
Note All VLAN IDs must be unique among all subinterfaces
configured on the same physical interface.
Tip To configure DOT1Q encapsulation on an Ethernet interface
without associating the VLAN with a subinterface, enter the
vlan-id dot1q command using CLI commands or FlexConfigs.
Configuring VLANs on the main interface increases the
number of VLANs that can be configured on the device.
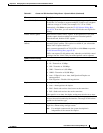
Name Name of the corresponding VLAN for an interface or subinterface.
Interface Identifies the logical name of the interface (interface role) or physical
interface.
Type Specifies whether a VLAN has access to Layer 2 or Layer 3.
Status Indicates whether a VLAN is active or suspended.
Add Row button Opens the Create VLAN dialog box to define a new VLAN.
Edit Row button Opens the Edit VLAN dialog box to edit the selected VLAN.
Delete Row button Deletes the selected VLAN.