68-38
User Guide for Cisco Security Manager 4.4
OL-28826-01
Chapter 68 Health and Performance Monitoring
Alerts and Notifications
Note See Managing Monitored Devices, page 68-5 for information about specifying the devices to be
monitored.
To switch to the Alerts screen:
• Click the Alerts button below the HPM menu bar.
(Click the Monitoring button to return to the Monitoring screen.)
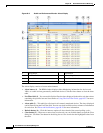
The Alerts listing is a basic table, consisting of rows and columns, with each row representing one alert
from a given device. Each column provides specific information about that alert: device name, alert
severity, time recorded, and so on. (See HPM Window: Alerts Display, page 68-29 for more about the
Alerts screen.)
Note The column headings are menus that you can use to filter the table by hiding or showing alerts according
to chosen parameters. For example, you might choose to display alerts for only a particular device, and
then choose only critical alerts for that device. See Working with Table Columns, page 68-8 for more
information.
In addition to scrolling the Alerts table, you can view sets of specific alerts:
• Use the List Filter field above this table to filter the list. See Using The List Filter Fields, page 68-17
for more information.
• Use the View Cleared Alerts window to view previously cleared alerts for a selected set of devices
over a specified time range. See Alerts: History, page 68-39 for more information.
You also can acknowledge alerts, clear alerts, and edit alert notes:
• You can acknowledge an alert, or clear it, as described in Alerts: Acknowledging and Clearing,
page 68-38.
• To add to an existing alert note, click Notes field for that entry in the table to open the Enter Notes
dialog box—used to view and add notes to an alert. Available only when a single alert with an
existing note is selected in the table.
Alerts: Acknowledging and Clearing
All alerts generated for monitored devices are displayed in the Alerts table, as described in Alerts:
Viewing, page 68-37. You can add notes to individual alerts, and you can acknowledge or clear alerts
individually or in groups.
To select an alert, click that entry in the Alerts table. You can Shift-click another alert to select the group
between the two, and you can Ctrl-click various rows to select multiple non-contiguous alerts.
When an alert is selected in the table, you can:
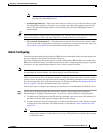
• Click the Acknowledge button to open the Acknowledge Alert dialog box, used to add a note to, and
then mark the selected alert(s) as acknowledged. You can acknowledge multiple alerts at one time.
Enter text in the Notes field in this dialog box (this is optional), and then click OK. The dialog box
closes and the alerts are marked as acknowledged with a timestamp displayed in the Notes column.
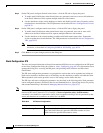
• Click the Clear button to open the Clear Alert dialog box, used to add a note to, and then remove the
selected entries from the Alerts table.
Enter text in the Notes field in this dialog box (this is optional), and then click OK. The dialog box
closes and the selected alerts are removed from the Alerts table.


