


34-4
User Guide for Cisco Security Manager 4.4
OL-28826-01
Chapter 34 Using Map View
Understanding Maps and Map View
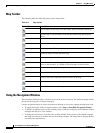
Map Toolbar
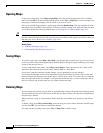
The following table describes the buttons on the map toolbar.
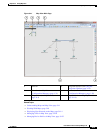
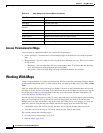
Using the Navigation Window
The navigation window displays a smaller version of the entire active map. The shaded rectangle defines
the area of the map that is currently displayed.
Use the navigation window to select the portion of the map to view and to change the map zoom level.
• To toggle the display of the navigation window, select Map > Show/Hide Navigation Window.
• To pan the navigation control to select which portion of the map to display, click within the shaded
rectangle and drag it to a new location.
• To change the zoom level, click one of the resizing handles in the corners of the shaded rectangle,
then drag it to increase or decrease the area of the map to display. The map zooms to display the area
covered by the map indicator.
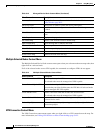
Table 34-1 Map Toolbar
Toolbar Button Description
Selects objects on the map. Click the button, then click items on the map.
Pans the map. Click the button, click and hold on the map, then drag the
cursor.
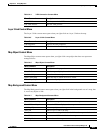
Zooms in on the map.
Zooms out from the map.
Zooms the map to fill a rectangle that you draw.
Zooms the map to include the entire map.
Zooms the map to actual size.
Creates a new Security Manager-managed node. After you create the new
device in the inventory, it is added to the active map as a device node.
Adds a new map object to the map.
Adds a new link to the map.
Creates a new VPN connection between nodes on the map.
Select devices to show on the map as device nodes.
Select VPNs to show on the map.