


66-15
User Guide for Cisco Security Manager 4.4
OL-28826-01
Chapter 66 Viewing Events
Overview of Event Viewer
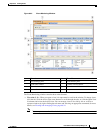
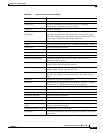
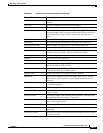
Table 66-5 Event Table Toolbar Elements
Callout Name Description
1 Search Within Results Field
(Quick Filter)
This tool is also known as the Quick Filter. Use it to search
for a word or phrase as well as to limit the scope of the search
to certain columns. Further, you can select whether the
search term used should be considered case sensitive,
whether wildcards may be used, and whether a match may be
partial, case sensitive, exact, or anywhere within a string.
This search operates only on the selected view and within the
data loaded. For more information, see Filtering on a Text
String, page 66-44.
2 Time Selector (Mode)
(Equivalent to View >
Mode.)
You use the time selector to do the following:
• Filter the events shown in the event table pane according
to the time they were received. See Selecting the Time
Range for Events, page 66-39.
• Select between a real-time view or historical views. See
Switching Between Real-Time and Historical Views,
page 66-38.
• Determine the time interval loaded in the client. If you
are using one of the modes that shows events from the
current time into the past, hovering the pointer over the
field shows the start and end times for the displayed
events. If you are using a specific time interval, the
interval is shown in the toolbar.
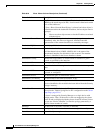
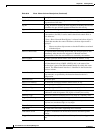
3 Events by IP Address Type
Selector
You use the events by IP address type selector to filter the list
based on the type of IP address included in the events.
Options are:
• All Events (Default)—Show all events regardless of the
address type. This is the default option.
• IPv4 Events Only—Show events only if all addresses in
the event are in IPv4 format.
• IPv6 Events Only—Show events only if at least one
address in the event is in IPv6 format.
Tip You cannot save your selection. The next time you
open the view, you need to reselect your option if you
want something other than the default.
4Save
(Equivalent to File > Save or
File > Save As.)
Click Save to save changes to the current view, including
filters (for custom views only), table preferences such as
selected columns, column width, and sort order, the time
range, and color rules.
Alternatively, click the down arrow and select Save As to
save changes as a new custom view. If you want to save filter
changes for a predefined view, you must use Save As to
create a new custom view. For more information, see
Creating Custom Views, page 66-37.