59-28
User Guide for Cisco Security Manager 4.4
OL-28826-01
Chapter 59 Configuring Router Interfaces
Dialer Interfaces on Cisco IOS Routers
Before You Begin
Define the virtual and physical dialer interfaces on the router. See Basic Interface Settings on Cisco IOS
Routers, page 59-1.
Note In addition, you can optionally define interface roles for the virtual and physical dialer interfaces. See
Defining Dialer Profiles, page 59-27.
Related Topics
• Defining BRI Interface Properties, page 59-29
• Dialer Interfaces on Cisco IOS Routers, page 59-27
Step 1 Do one of the following:
• (Device view) Select Interfaces > Settings > Dialer from the Policy selector.
• (Policy view) Select Router Interfaces > Settings > Dialer from the Policy Type selector. Select
an existing policy or create a new one.
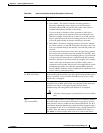
The Dialer page is displayed. See Table 59-11 on page 59-30 for a description of the fields on this page.
Step 2 Select a dialer profile from the upper table on the Dialer Interfaces page, then click Edit, or click Add
to create a profile. The Dialer Profile dialog box appears. See Table 59-12 on page 59-31 for a
description of the fields in this dialog box.
Step 3 Enter the name of the interface or interface role that represents the virtual dialer interface, or click Select
to select an interface role object or to create a new one. For more information, see Specifying Interfaces
During Policy Definition, page 6-70.
Step 4 Enter a name for the dialer profile. Having a name makes it easier for you to assign the correct dialer
pool to the physical interface. See Defining BRI Interface Properties, page 59-29.
Tip We recommend that you define a name that is logically associated with the site to which the
dialer interface serves as a backup. For example, if the dialer interface is serving as a backup
connection to the London site, define the name London for the dialer profile.
Step 5 Enter an ID number for the dialer pool to associate with this dialer interface. Each dialer interface is
associated with a single pool. Multiple interfaces may, however, be associated with the same dialer pool.
Step 6 Enter the number of the dialer group to assign to the dialer interface.
Step 7 (Optional) In the Interesting Traffic ACL field, enter the name of the extended ACL object that defines
which packets are permitted to initiate calls using this dialer profile, or click Select to select the object
from a list or to create a new one. Use this option to limit the IP traffic that can make use of the dialer.
Step 8 Enter the dialer string, which is the phone number of the remote side of the dialer interface connection.
Step 9 (Optional) Modify the default timeout values (Idle Timeout and Fast Idle Timeout), if required.
Step 10 Click OK to save your definitions locally on the client and close the dialog box. The dialer profile
appears in the Dialer Profile table on the Dialer page.


