60-91
User Guide for Cisco Security Manager 4.4
OL-28826-01
Chapter 60 Router Device Administration
DHCP on Cisco IOS Routers
Step 4 Under IP Pools, click the Add button to display the IP Pool Dialog Box, page 60-94. From here you can
define the address pools to be used by the DHCP server. For more information, see Defining DHCP
Address Pools, page 60-91.
Step 5 (Optional) When you use a relay agent to manage requests from DHCP clients located on a different
subnet from the DHCP server, define the following DHCP relay options:
a. Select the relay agent information reforwarding policy (Drop, Keep, or Replace). DHCP relay agents
implement this policy when they receive messages already containing relay information.
b. Select the Option check box to enable the insertion of Option 82 data in requests that the relay agent
forwards to the DHCP server.
c. Select the Check check box to validate DHCP Option 82 reply packets sent by the DHCP server.
When you enable this option, invalid messages are dropped. Valid messages are stripped of the
option-82 field before they are forwarded to the DHCP client. When you disable this option, the
option-82 field is removed from the packet without being checked first for validity.
See Understanding DHCP Relay Agents, page 60-88 for more information.
Defining DHCP Address Pools
When you configure a DHCP policy that does not include an external database agent, you must define
at least one IP address pool. This pool contains the addresses that the DHCP server can dynamically
assign to DHCP clients. Additionally, you can define the following IP pool-specific options:
• The default routers, DNS servers, WINS servers, and domain used by DHCP clients.
• Whether to use the Secured ARP feature.
• Whether to import information regarding IP pool options from a centralized DHCP server.
• The length of the lease.
• The location of the TFTP server that IP telephony devices require to use addresses from this pool.
Related Topics
• Defining DHCP Policies, page 60-90
• DHCP on Cisco IOS Routers, page 60-87
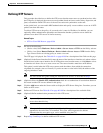
Step 1 On the DHCP page, click the Create button under IP Pools. The IP Pool dialog box is displayed.
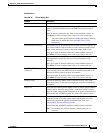
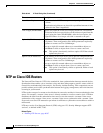
Step 2 Define the address pool. See Table 60-40 on page 60-95 for a description of the available fields.
Step 3 Click OK to save your definitions locally on the client and close the dialog box. The IP pool appears in
the table displayed under IP Pools on the DHCP page.
Step 4 Repeat Step 1 through Step 3 to define additional address pools, if required.
Note To edit an IP pool, select it from the table, then click the Edit button. To delete an IP pool, select
it from the table, then click the Delete button. You cannot delete a pool whose addresses have
been assigned to DHCP clients.


