


30-54
User Guide for Cisco Security Manager 4.4
OL-28826-01
Chapter 30 Managing Remote Access VPNs on ASA and PIX 7.0+ Devices
Working with SSL and IKEv2 IPSec VPN Policies
Tip Ensure that you add AnyConnect images of the required releases. For example, if you are configuring
an IKEv2 IPsec VPN, you must include an AnyConnect 3.0 or higher image. In general, the image
versions must support the features you are deploying in the remote access VPN.
Related Topics
• Understanding SSL VPN AnyConnect Client Settings, page 30-52
• Cisco AnyConnect Profile Editor, page 30-53
• Understanding and Managing SSL VPN Support Files, page 29-5
• Configuring Other SSL VPN Settings (ASA), page 30-41
Step 1 Do one of the following:
• (Device view) With an ASA device selected, select Remote Access VPN > SSL VPN > Other
Settings from the Policy selector.
• (Policy view) Select Remote Access VPN > SSL VPN > Other Settings (ASA) from the Policy
Type selector. Select an existing policy or create a new one.
Step 2 On the Other Settings page, click the Client Settings tab. The tab has two tables listing the configured
AnyConnect clients and profiles separately.
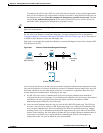
The AnyConnect images include an order number. The security appliance downloads portions of the
AnyConnect images to the remote computer until it achieves a match with the operating system, starting
with the highest order number. Therefore, you should give the highest number to the image used by the
most commonly-encountered operating system.
Because mobile users have slower connection speeds, you should load the AnyConnect image for
Windows Mobile at the top of the list. Alternatively, you can decrease the connection time by specifying
the regular expression Windows CE to match the user agent on Windows Mobile devices. When the
browser on the mobile device connects to the ASA, it includes the User-Agent string in the HTTP header.
The ASA, receiving the string, immediately downloads AnyConnect for Windows Mobile without
ascertaining whether the other AnyConnect images are appropriate.
Step 3 To add an AnyConnect client image or make changes to the existing list, do any of the following:
• To add an AnyConnect image, click the Add Row button beneath the table and fill in the Add
AnyConnect Client Image dialog box. You need to specify the name of the File object that defines
the image and the priority order of the image. You can also specify a regular expression for the
connecting client to speed up the download. For detailed information about the options, see
Add/Edit AnyConnect Client Image Dialog Box, page 30-55.
• To edit an image, select it, click the Edit Row button, and make your modifications in the Edit
AnyConnect Client Image dialog box.
• To delete an image, select it and click the Delete Row button. You are asked to confirm the deletion.
Step 4 To add an AnyConnect profile or make changes to the existing list, do any of the following:
• To add an AnyConnect profile, click the Add Row button beneath the table and configure these
options in the Add AnyConnect Client Profile dialog box:
–
AnyConnect Profile Name—The name of the profile.