62-2
User Guide for Cisco Security Manager 4.4
OL-28826-01
Chapter 62 Configuring Logging Policies
Logging on Cisco IOS Routers
Note To send syslog messages from the router to a syslog server, you must also define the IP address of the
syslog server. For more information, see Defining Syslog Servers, page 62-3.
Related Topics
• Defining Syslog Servers, page 62-3
• Understanding Log Message Severity Levels, page 62-4
• Logging on Cisco IOS Routers, page 62-1
Step 1 Do one of the following to access the router’s Syslog Logging Setup page:
• (Device view) Select Platform > Logging > Syslog Logging Setup from the Policy selector.
• (Policy view) Select Router Platform > Logging > Syslog Logging Setup from the Policy Type
selector. Select an existing policy or create a new one.
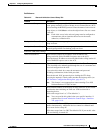
The Syslog Logging Setup page is displayed. See Table 62-2 on page 62-8 for a description of the fields
on this page.
Step 2 Select Enable Logging to turn on the syslog logging feature. If this option is not selected, no log
messages are created.
Tip To use the device’s default logging settings, or to restore the default settings, simply select
Enable Logging, ensure all other fields are blank, then click Save. The default settings vary by
device. See your router documentation for more details.
Step 3 (Optional) In the Source Interface field, enter the name of the interface or interface role whose address
should be used as the source interface for all log messages sent to a syslog server; or click Select to select
an interface role from a list or to create a new one. The source interface must have an IP address.
This option is useful when the syslog server cannot reach the address from which the connection
originated (for example, due to a firewall). If you do not enter a value in this field, the address of the
outgoing interface is used.
Step 4 (Optional) To send log messages to a syslog server:
a. Select Enable Trap. This option is selected by default.
b. Select a value from the Trap Level list. All messages of this severity or greater (that is, having the
same or a lower severity-level number) are sent to the syslog server; messages of a lesser severity
are ignored. For more information about severity levels, see Table 62-1 on page 62-4.
Step 5 (Optional) To save log messages locally to a buffer on the router:
a. Select Enable Buffer. This option is selected by default.
b. Enter the Buffer Size in bytes.
c. Select the lowest severity level for messages to be saved to the buffer. All messages of that severity
level or greater are saved to the buffer.
d. Select Use XML Format to save messages in XML format. (You can configure both the regular
buffer and the XML buffer in the same policy.) If you select this option, enter the size of the XML
buffer in bytes.


