64-51
User Guide for Cisco Security Manager 4.4
OL-28826-01
Chapter 64 Configuring Routing Policies
Static Routing Policy Page
• (Policy view) Select Router Platform > Routing > Static Routing from the Policy Type selector.
Select an existing policy or create a new one.
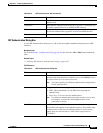
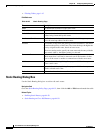
The Static Routing page is displayed. See Table 64-25 on page 64-52 for a description of the fields on
this page.
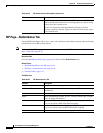
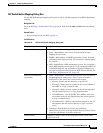
Step 2 On the Static Routing page, select a static route from the table, then click Edit, or click Add to create a
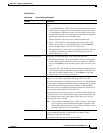
route. The Static Routing dialog box appears. See Table 64-26 on page 64-53 for a description of the
fields in this dialog box.
Step 3 (Optional) Select the Use as Default Route check box to make this route the default route for all
unknown outbound packets.
Step 4 In the Prefix field, enter the address for the destination network, or click Select to select a network/host
object from a list or to create a new one. For more information, see Specifying IP Addresses During
Policy Definition, page 6-81.
Step 5 Select a forwarding option:
• To define the router interface that forwards packets to the remote network, select Forwarding
Interface and enter the name of an interface or interface role. You can click Select to select an
interface role from a list or to create a new one. See Understanding Interface Role Objects,
page 6-67 and Selecting Objects for Policies, page 6-2.
• To specify the next hop router that receives and forwards packets to the remote network, select
Forwarding IP, then enter the address in the field provided, or click Select to select a network/host
object from a list or to create a new one. For more information, see Specifying IP Addresses During
Policy Definition, page 6-81.
Step 6 (Optional) In the Distance Metric field, enter the number of hops to the next hop address for this router.
This metric identifies the priority of the static route. If two routing entries specify the same network, the
route with the lower metric value (that is, the lower cost) is given a higher priority and is selected.
If no value is specified, the default is 1, which implies a directly connected network.
Step 7 (Optional) Select the Permanent route check box to prevent this static route entry from being deleted,
even in cases in which the interface is shut down or the router cannot communicate with the next router.
Step 8 Click OK to save your definitions locally on the client and close the dialog box. The static route appears
in the table on the Static Routing page.
Static Routing Policy Page
Use the Static Routing page to create, edit, and delete static routes. For more information, see Defining
Static Routes, page 64-50.
Navigation Path
• (Device view) Select Platform > Routing > Static Routing from the Policy selector.
• (Policy view) Select Router Platform > Routing > Static Routing from the Policy Type selector.
Right-click Static Routing to create a policy, or select an existing policy from the Shared Policy
selector.
Related Topics
• Static Routing on Cisco IOS Routers, page 64-50
• Table Columns and Column Heading Features, page 1-46


